This project was done as a joint effort with my friend Allison.
The design comes from Knock-off Wood. If you haven’t seen Ana White’s website and reader submissions you should do that immediately. She is quite an inspiration. What follows is a close reproduction of the plans, except for a modification to the center-support to make it more user-friendly. You will have to check out Ana’s design to see the differences.
Allison took all of these pictures, so our write-ups are going to look rather similar.
————————————————————
Step one: making the cuts
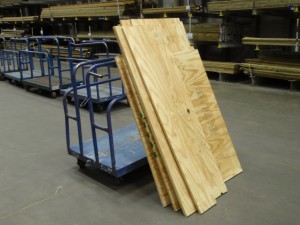
We had the guy at Lowe’s make several of the rips on their panel-saw to save us time. Back in the shop, we then finished the final rips and several shorter cuts before starting the assembly.

————————————————————
Step two: glueing and screwing the “benches”
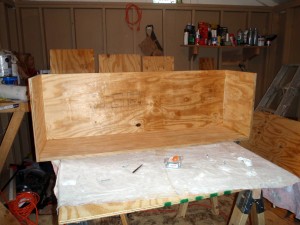
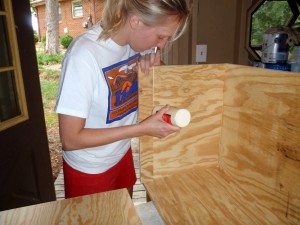
We started the assembly with copious amounts of glue and screws. Here you can see Allison employing the guide that was used to apply the glue accurately, and then align the holes for screws on the other side of the panel. This was a huge time-saver.
————————————————————
Step three: testing and posing
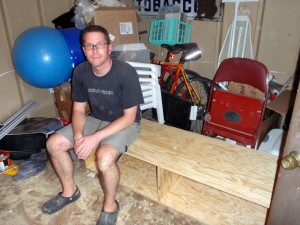
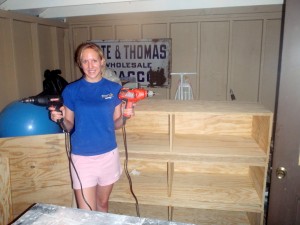
After putting together a few benches, we tested them out and posed a bit for the camera
————————————————————
Step four: constructing the center support
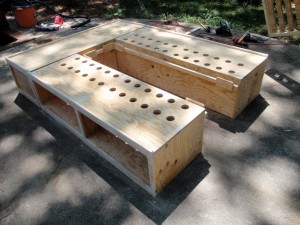
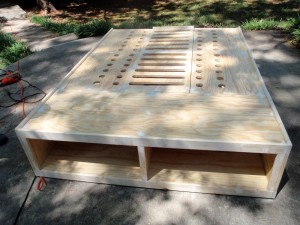
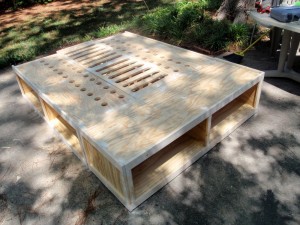
Comments from Anna’s readers and design modifications led us to believe that it was important to ensure that the mattress could breathe adequately. We used a 2.25″ hole-saw to make beveled edges, and then linked the holes with cuts from the circular saw. When you see the ventilation added to the benches, notice that we used only the holes… we had grown tired in the 100 degree heat and skipped the additional step there. We also opted to keep the holes closer to the vertical support on the inside of the benches to reduce possible flex near the openings (probably not a serious concern).


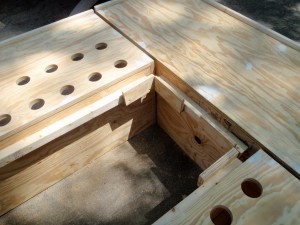
Another requirement was that the bed could be taken apart without power tools. This lead to a re-design from the original 2×4 support that was supposed to be screwed to the three benches for assembly. This version uses a 2×2 frame (with a 2×4 in the middle to join the two pieces of plywood) resting on top of 2×2 supports glued/screwed into the backs of each bench. A key piece is that plywood “hooks” were added to create a structure that holds the three sections together tightly once dropped in place. This took a bit of sanding and tweaking, but worked out quite well in the end.
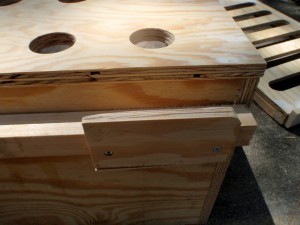
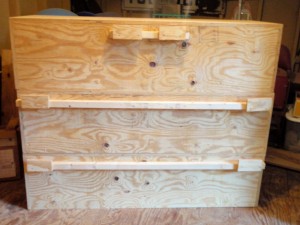
Once set in place, you can see how the hooks keep the bed square and the sections aligned in all directions once the center piece is dropped in place.
————————————————————
Step five: trim, wood putty, and sanding
We used 1×2 and 1×3 pine furring strips to trim out the front of the benches. It was quite handy to have a few two-foot clamps to keep everything straight. If you look closely, you can see that we used 1×3 strips on the top edge instead of the 1x2s that Ana prescribes. This was done to add a lip to keep the mattress from shifting.
Square-drive “trim head” screws were used on the strips to keep the holes small, and then wood putty was used to cover all of the screws. Even the screws that are covered by the mattress were patched and sanded to minimize damage to bedding materials.
————————————————————
Step six: paint and final assembly
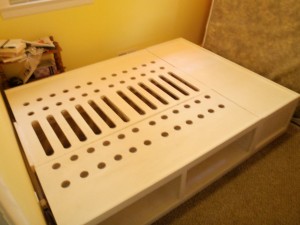
Even with a single coat of primer, the bed looked great. I would do a project like this again in a heartbeat. It is worth repeating how essential Ana White’s plans were in making this a reality!
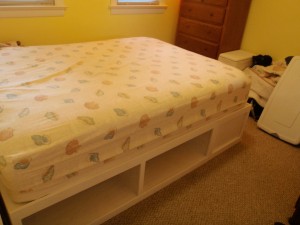
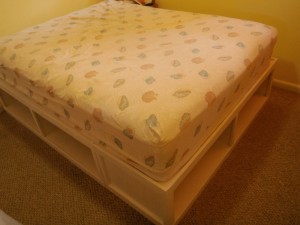
Looks great! Did you just regular old plywood? Any problems with it not being exactly 3/4″ thick? I ask as I’m toying with using MDF, but might just use boring old plywood since it is getting painted.
BEAUTIFUL bed. You are tremendously talented, and I love looking at all the things you accomplished here. Do you possibly have a link to the plans (with the good pictures) for this bed? The ones on Ana Whites website are too small to read, and I found a link in the comments to click on for better pics, but they take me to “page not found”. Could you please help me? Thank you so very much…….Chris
I want to build this (I got your website from Ana’s), and I liked how you modified it to be able to dissemble it with out power tools. I do have a few questions though.
About how much did it cost you (I plan to prime it and paint it white like your first one)?
How many hours did it take you?
Are the holes to aerate the bed necessary? I have never heard of/had an issue with mildew.
I was only mildly concerned about the mildew issue. The topic came up on Anna’s site when I was looking through reader posts. People also claimed that there were complaints of mildew with the original manufactured product. The suggestion was to use a mattress “gripper” pad (or something of that nature) to provide a bit more room for air to flow.
The sheets of plywood for this project were ~$30/each. The trim for this bed was basic pine furring strips that are very cheap… take care to find the straightest ones in the pile since some end up being pretty warped/cracked. Since the plan was to paint it from the beginning you can save a few bucks and get the lower-grade wood. On my second bed I used $50/sheet plywood because it was getting stained… that bed had oak trim and cost almost three times as much to build after paying for all of the stain.
The time for this painted bed was probably 20 hours or so. I spent considerably more time on the stained version with oak trim. Each cut for the trim needed to be much more precise, and I used a miter saw for that. For my second bed, I also utilized an air nailer with 1/8″ brads… that saved a TON of time… definitely worth the price.
This project just used regular (b/c) plywood. The “B” side has the holes filled and sanded for the exposed/painted surfaces. It is pretty easy to put in wood putty over any imperfections and paint it for a good finish. I also used white latex caulking (dynaflex 230) for any imperfections between the wood and the trim. It is paintable and flexible… I love the stuff.
a note on the sizing: plywood is a hair less than 3/4″ of an inch thick, but it doesn’t really matter for this project. The only thing you should take extra care with is the center divider for each bench. I cut my pieces after measuring the actual opening size on the first bench to see what size to make them.
MDF will look better initially, but I WOULD NOT use it. It is tricky to glue, screws pull out, and it will not last many years. In the end it will end up on the curb… just like all the other MDF furniture that nobody wants anymore. Plywood is not real wood, but it will provide you with a vastly superior product to use 5 years from now.
I love it! I was wondering if you could send me the plans you made for the center support and the hooks to keep it all together. My husband is in the military and this would make it sooo much easier to move around.
you said this is regular b/c grade plywood…are we talking hard or softwood plywood? my local plywood suppliers are charging $45/sheet for the plywood called for in Ana’s plan.
Hi Tricia,
The plywood that I used i this project as ~30/sheet… I don’t think there really is “hardwood” plywood per se… the expensive stuff may have an Oak veneer (which is hardwood), but the intermediate layers are likely not Oak. The $45/sheet stuff will have fewer voids, put it is not critical to get the high-end stuff if you are able to fill it with wood putty and paint it a solid color. I got expensive plywood (Oak veneer – $50/sheet) for the bed that I stained since it was important to see the wood grain. If you need to save money on the plywood, shop around a bit (if you can).
Hi Amra,
sorry… no plans for the center support. I made it the same size as Anna’s center. The support piece had 2x2s around the perimeter, and 2x2s were glued and screwed into the boxes below that. The tabs that lock it all together are just pieces of plywood that I screwed in to hook it up.
I would recommend the technique that I used in the “oak” bed on my site since it is much more simple. Just build the center support, and attach the 2x2s to the boxes for support. Once the bed is assembled and square, drive 3″ screws down to hold the center piece into the supports. Much easier than Anna’s technique, and extremely solid… hope that helps.
I would like to make my daughter this bed, in a full size…..I have been struggling with figuring out the measurements….I went to the ana white sight without much luck….any suggestions? wasn’t sure if I should add extra inch or so for the mattress? Any help would be appreciated…..lost in PA. haha
It looks like your modifications made the side boxes wider than the 12 in. in the plan. What width did you use, and did you change the end box?
Hi Joyce B. Ana’s site should have the specs for a full sized version as well. The final size of the box-structure should be the exact size of the mattress… the trim that is added around the perimeter will add an extra 1.5 inches if it is flush with the top. On the beds that I built, the trim runs above the bench level, but there is plenty of space since mattresses tend to be curved at the edges, and I really didn’t want wood sticking out the sides of the bed to get hit by a leg.
Hi JT. I followed the width of the boxes in the plan exactly. The modification that I made was to add a 2×2 board on the inside of each box to rest the center support on. This may make them look like they are wider… The end box is unchanged as well.
The only real dimensional modification I made was to make my OAK bed a little bit shorter since I didn’t want such a tall bed.
Great project, and I’m thankful for the simplification and thorough explanation of the center support. It makes a lot more sense than the original design on Ana’s site.
I have a suggestion for a way to make the project even more simple:
Why not cut two identical plywood sections of 20″x60″ for a top and bottom, three identical 19 1/4″ x 12 1/2″ pieces for the ends and the center divider, and then a 58 1/2″ x 15″ piece for the backboard… place all the dividers and the backboard between the top and bottom pieces, and when its all tied together, get some 2×2 and run it all the way around the bottom of the finished sections as a standoff. That way each section has maximum rigidity, and the entire weight of the bed/bedding/humans/etc isn’t resting on a 3/4″ border running around the bottom?
If you do this, the bench sections will be massively stronger and you greatly reduce the risk of the bed collapsing to the floor in the unlikely but possible event that the plywood base edge gets damp and warps/delaminates. It also means spreading the bed load over a one hundred percent larger area, cutting down on damage potential to hardwood floors or carpet.
I’m not a carpenter so maybe I’m missing the reason Ana’s bed isn’t designed my way, but I do look for places to simplify these kind of things and if it comes out stronger I’m all for it. If anyone has any reason why my suggestion won’t work I definitely would like to hear it and learn something.
What I don’t understand is why are the benches designed this way? Wouldn’t it be a lot simpler to construct these like cabinets instead of benches, with three identical pieces for the left and right sides and center divider, and two identical pieces for the top and bottom, and one unique piece for the back? It would be a lot less measuring and cutting!
Once it was assembled you get a side benefit: instead of having all that weight from the bed and the occupants sitting on a thin 3/4 inch “track” which can damage carpets and wood floors, the builder could run some 2×2 stock around the bottom to offer more support and rigidity, and help save the flooring. Also, the drawer shelf would be resting directly on its support instead of being supported between the sides.
I’m not exactly a hobbyist or DIY champ, I’m just getting in to this stuff, but I would think simpler would be better.
Have to admit… I do not know the theory behind this construction mechanism. What I do know is that it is common to build with only the thin perimeter edge touching the floor. I have had MDF furniture break over time at the bottom edges, so I understand your concern. Plywood is quite strong, so I am not too concerned about the beds that I have made. There may be a benefit to not having large, flat sheets on floors for a long period of time. This method also makes it look like you have used a thick (expensive) sheet of wood for the bottom with a minimum amount of expense.
With Ana’s design, the weight is distributed along the edges of the boxes. For my Oak bed, I added corner supports and rubber pads… so all of the weight is concentrated in those four spots (12 in total). In theory, there is an advantage in that method since I could put in adjustable supports or spacers if there was some misalignment in the floor or inaccuracy in my construction. There is a lot of glue in this project, so I am not concerned about it collapsing.
The bed certainly could be constructed as you describe, since the trim pieces would cover up the seams, regardless. There would be a small amount of added expense in adding the wood perimeter around the bottom. Not a big deal with pine, but with oak the cost would be significant. One reason not to place the sides and back on top of the bottom sheet may be to give the structure some extra rigidity while using as little wood as possible.
Keep in mind that Ana’s designs are inspired from many mass-produced products… these companies try to save wood/weight/money in any way possible. A true woodworker would often make different decisions, but Ana’s designs are solid and economical as a result of their lineage.
Is maple plywood, sufficiently strong for it to last many years? I am a beginner and don’t understand the differences in plywood, pine etc.
Thanks
Regarding Plywood types: I don’t personally think there is a lot of difference as far as cabinet-grade plywood goes in terms of strength… it has more to do with the grain and color. The biggest difference that I have seen is in the quality A/B vs. B/C grade plywood. The cheaper B/C-grade stuff tends to have more voids and inconsistencies. Having more expensive plywood, with more layers, will also provide a more consistent structure.
Probably better to consult a pro, or the internet instead of my opinion on this one, though.
I built it this weekend with a space at the footer section to sit down and tie my shoes. I also used one more “rib” in the side box (three boxes by side) because I don’t trust much this material. I suspect it will bend with my wight. Thanks for sharing!